For Bedrock Edition · Windows · Android · iOS
Minecraft Skin Pack Maker for Bedrock
Use this Minecraft skin pack maker to put up to 80 skins into one Bedrock skin pack. Add skins you made from photos on Photo2Skin.online or your own PNG files, name each one, pick Steve or Alex arms, then get a single .mcpack file that opens in Minecraft Bedrock.
Bedrock only. Java Edition does not support skin packs. For Java, use a single skin PNG, as shown in How to change your Minecraft skin.
- Up to 80 skins
- Steve & Alex arms
- 64×64 or 64×32 PNG
- Pack icon & description
Family Pack
by Mia · 6 skins
Family_Pack.mcpack
- 1Add skins
- 2Name & order
- 3Pack details
- 4Check & build
1Add skins
2Name & order
0 / 80 skinsDrag to change the order. The first skin is listed first. Skins made on Photo2Skin.online are Classic, so choose Steve for them.
No skins yet. Add them from a photo, a PNG file or My skins.
3Pack details
How to make a Minecraft skin pack
- 1
Add your skins
Make a skin from a photo on Photo2Skin.online, upload PNG skins you already have, or pick skins you saved here before.
- 2
Name and sort them
Give each skin the name you want to see in Minecraft, choose Steve (wide arms) or Alex (slim arms), and drag the skins into order. The first skin is listed first.
- 3
Name the pack and build it
Type a pack name. Optionally add a pack description (up to 200 characters) and author (up to 50 characters). Check the pack icon—it is made from the front of your first skin's head, including the hat layer, at 256×256, or upload your own square PNG. Check every skin in the 3D view, then select Get .mcpack and open the file on your PC or phone.
What the .mcpack maker puts in your file
A .mcpack is a zipped Bedrock pack that Minecraft knows how to open. The file this page builds follows the skin pack layout in Microsoft's Bedrock creator documentation: a manifest, a skins list, a language file with your pack and skin names, and one PNG per skin. Each skin is marked with the Steve or Alex model you picked, so it keeps the right arm width in the game.
Skin files you can add: 64×64 or 64×32 PNG
Every skin must be a PNG that is 64 pixels wide and either 64 or 32 pixels tall. 64×64 is the current layout with separate left and right limbs and outer layers. 64×32 is the older layout, where the left arm and leg mirror the right ones. Files of any other size, such as 128×128 HD skins, are not added and you will see a message saying why. See Minecraft skin size for the full layout.
Steve or Alex: pick the arms for each skin
Steve skins have 4-pixel-wide arms and Alex skins have 3-pixel-wide arms. Pick the model the texture was drawn for. If the arms show a gap or a stretched stripe in the 3D view, switch the model for that skin. Skins made from photos on Photo2Skin.online are Classic, so choose Steve for them. More in Slim vs classic Minecraft skin.
Add the skin pack to Minecraft Bedrock
Bedrock only · Java Edition has no skin packs.
- Open the .mcpack file. On Windows, open the file where your browser saved it. On Android or iPhone, open it from your Files app or where your browser saves files and choose Minecraft if your device asks which app to use. Minecraft starts and imports the pack.
- Find the pack in Dressing Room. Go to Dressing Room and open Classic Skins. Imported packs are usually listed with your other skins, often near Owned. Look for the pack name you typed. Labels can change between game updates.
- Equip a skin. Choose a skin from your pack and equip it. You can switch to another skin in the same place at any time.
Pack not showing? Make sure you opened the file with Minecraft Bedrock, not a zip app; restart the game; and update Minecraft if it is out of date.
Xbox, PlayStation and Nintendo Switch have no way to open a .mcpack file saved on your phone or computer, so use the pack on Windows, Android or iOS.
Your own PNGs and generated skins
PNG skins you upload yourself use no credits to pack. To generate a new skin, sign in and spend 1 credit for a front & back preview, then 2 more credits for the full clean skin. Already unlocked skins can be downloaded again and packed without another credit charge. See Pricing.
Why put skins in a pack
One file
Move a whole set of skins between devices with a single .mcpack.
Named skins
Each skin keeps its own name in Dressing Room.
Right arms
Steve or Alex is saved per skin, so slim skins stay slim.
Your PNGs, no credits
Skins you upload yourself go into the pack without using credits.
Family & friends
Make a skin from each person's photo and keep the whole set in one pack.
Minecraft skin pack maker FAQ
What is a .mcpack skin pack?
A .mcpack is a zipped pack file for Minecraft Bedrock Edition. A skin pack .mcpack holds a manifest, a list of skins, a language file with the pack and skin names, and the skin PNGs. When you open it on a supported device, Minecraft imports the pack and the skins show up in Dressing Room.
Does the skin pack work on Java Edition?
No. Skin packs are a Bedrock Edition feature, and Java Edition does not load .mcpack files. On Java you use one skin PNG at a time, which you set in the Minecraft Launcher or on minecraft.net. Our guide How to change your Minecraft skin shows the steps.
How many skins can one pack hold?
One pack built here can hold from 1 to 80 skins. If you have more, build a second pack with a different name.
What is the difference between 64×64 and 64×32 skins?
Both are accepted. 64×64 is the current skin layout, with its own space for the left arm, left leg and the outer layers. 64×32 is the older layout: it has no separate left limbs, so the left arm and leg copy the right ones. Any other size, including HD skins such as 128×128, cannot be added.
Should I choose Steve or Alex for each skin?
Choose the model the skin was drawn for. Steve (Classic) has 4-pixel-wide arms and Alex (Slim) has 3-pixel-wide arms. A Slim texture on Steve arms shows a stripe of stray pixels, and a Classic texture on Alex arms cuts off part of the sleeve. Skins made from photos on Photo2Skin.online are Classic, so pick Steve for those.
How do I add the pack on Windows, Android or iPhone?
Open the .mcpack file on the device where you play and choose Minecraft if you are asked which app to use. Minecraft starts and imports the pack. Then go to Dressing Room, open Classic Skins and look for your pack name, which is usually listed with your owned skins. Menu names can change between game updates, so if you don't see it right away, restart the game and check again.
Can I use the skin pack on Xbox, PlayStation or Switch?
Consoles cannot open a .mcpack file saved on your phone or computer, so this pack is meant for Minecraft Bedrock on Windows, Android and iOS. On a console you can still pick the skins and skin packs available in the game itself.
Does packing my own PNGs cost credits?
Packing your own PNGs uses no credits. Generated skins require an account: 1 credit for a front and back preview, then 2 more for the chosen full clean skin. Packing an already unlocked skin does not charge again.
Can I set a pack icon and description?
Yes. The pack icon is made automatically from the front of your first skin's head, including the hat layer, at 256×256. You can also upload your own square PNG to replace it. Pack description (optional, up to 200 characters) and author (optional, up to 50 characters) are written into the pack. Exact labels after import can vary by game update, so look for the pack name you typed.
More tools and guides
Bedrock skin maker from your photo · check a skin in 3D · make a Halloween skin set
Add at least one skin to get your pack.
Bedrock import: pack route and single-PNG device notes
You can import a single PNG without building a pack. The following device notes preserve the former Bedrock photo guide. For a pack, export the .mcpack, open that file with Minecraft on a supported device, wait for the import confirmation, then select the imported pack in Classic Skins. This is a schematic route, not a screenshot.
| Stage | Pack import diagram | Check |
|---|---|---|
| 1. Prepare | PNG files → names and arm models → .mcpack | Keep each original texture; select the correct model for each entry. |
| 2. Open | Downloads / Files → open .mcpack with Minecraft | Use the exported pack file, not an individual portrait. |
| 3. Confirm | Minecraft → import confirmation → Dressing Room | If opening fails, confirm the file was saved completely. |
| 4. Equip | Classic Skins → imported pack → choose skin | Inspect the character after equipping; console support differs from Windows/mobile. |
Windows: use Dressing Room to add the skin
Launch Minecraft for Windows and open Dressing Room from the main menu. Select the character slot you want to change, then find Classic Skins. Open Owned, choose Import and use Choose New Skin to locate your saved PNG. When the game asks which model to use, choose the arm shape matching the texture.
Look over the character before entering a world. If the sleeves appear split or a strip is missing from an arm, check the arm model choice. If you cannot locate the image, revisit the folder where your browser saved it and confirm the file name. The Java launcher’s Skins tab belongs to Java Edition; changing that skin is a separate action from changing the character in Minecraft for Windows.
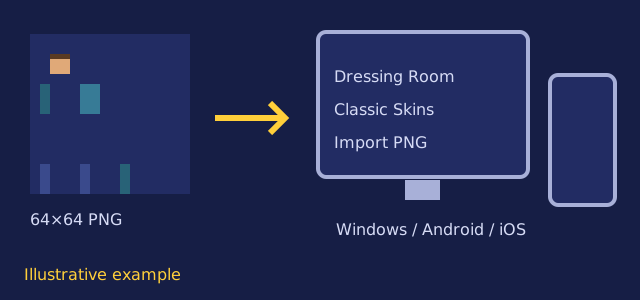
Android: find the image on your device
On Android, keep the skin PNG in an accessible image or files location. Open Minecraft, tap Dressing Room, select a character and open Classic Skins. In Owned, use Import and Choose New Skin, then select your image through the device picker. Confirm the model and inspect the equipped character.
If the picker does not show the PNG, check the location used by your browser and any image-access permission requested by Minecraft. Choose the original skin file rather than a thumbnail copied from a messaging app. Interface labels can vary with game updates and screen size, so look for the custom image import option within Classic Skins. Return to Dressing Room after selection to confirm that the intended character slot changed.
iOS: select the saved skin image
On iPhone or iPad, save the PNG in a location available to the image picker, such as Photos. Open Minecraft and go to Dressing Room. Select your character, open Classic Skins and Owned, then choose Import and Choose New Skin. Select the skin image and confirm the matching arm shape.
If access to pictures is limited, make sure Minecraft can access the selected skin image. Keep the original picture separate from the finished texture so you do not select the portrait by mistake. A skin texture looks like separated colored rectangles laid out on a square canvas. That unusual appearance is expected: the game wraps those rectangles around the character to form the face, sleeves and other surfaces.
Console limits and using more than one edition
Xbox, PlayStation and Nintendo Switch do not support the same custom PNG import route. Choose their built-in character options or available skin packs. Do not assume that equipping an imported image on a phone makes that image available on your console. Minecraft’s Character Creator FAQ explains the Windows and mobile support and console limitation.
For installation troubleshooting, see how to change your Minecraft skin. If you also play Java, add the PNG separately in that edition. For the portrait step, use the custom skin from photo guide; for recognizable facial features, read face to Minecraft skin.
Have several Bedrock skins? Put them in one file with the Minecraft skin pack maker.