Slim vs Classic Minecraft Skin
Make my skin — no-watermark from $1
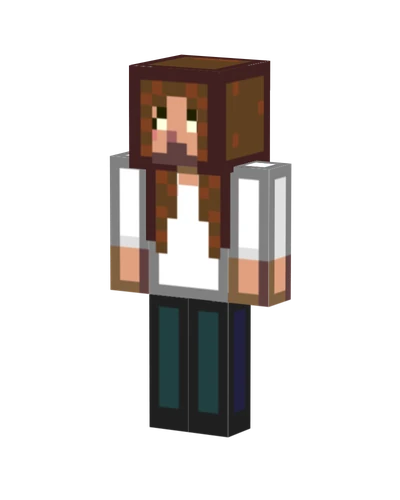
The main difference between Slim and Classic Minecraft skins is arm width. Classic uses arms that are four pixels wide; Slim uses arms that are three pixels wide. The names Steve and Alex are often used as shorthand for those model shapes. They describe geometry here, rather than a rule about what a character must wear or who can use it.
Photo2Skin makes Classic-arm skins only. Its photo-to-skin generator outputs a 64×64 texture for four-pixel arms, and it has no Slim generation setting. The explanation of Slim below helps you recognize other skin files and understand import choices; it is not a promise that the generator can produce both models.
Slim vs Classic Minecraft skin: compare the arm shapes
Both models use the familiar block head, torso and legs. Slim narrows the arms, giving the shoulders and sleeves a different silhouette. Classic provides an extra column of pixels across the arm width, which can be useful when painting a sleeve stripe, cuff or other small detail. Neither model makes the face more detailed: the head still uses the same small surface areas.
The model choice does not automatically change clothing colors, hair or facial features. It changes the geometry that receives the arm texture. A simple outfit can work well on either shape when its texture is painted for that shape. Choose based on the file you have and the silhouette you want, rather than assuming that one format is an upgrade.
Why the PNG dimensions do not identify the model
A modern Classic skin and a modern Slim skin can both be 64×64 PNGs. Dimensions tell you the canvas size, but not which arm model the artist intended. The arm faces occupy different widths within the texture map, so their arrangement matters as much as the overall image size.
If you made the skin yourself, use the model you selected in the editor. If you received it from an artist, check their description or ask which model it uses. For a Photo2Skin-generated file, select Classic. Treat automatic model detection as a convenience to verify visually, particularly for skins with unusual transparency or empty texture regions.
Recognize a model mismatch
A skin intended for a different arm shape may show misplaced sleeve edges, unexpected transparent strips or colors wrapping onto the wrong side of the arm. These problems are easiest to see by rotating the character and looking at the shoulder, wrist and inner arm. A front view alone can hide a seam that becomes obvious from the back.
Start by checking the model selection rather than repainting the file immediately. If switching to the intended model fixes the sleeve, the texture itself may be fine. If the problem remains, inspect the arm regions in a skin editor. Also check the outer layer: a jacket sleeve can cover an otherwise correct base arm.
Changing models requires texture editing
Selecting Slim during import does not convert a Classic texture into a properly painted Slim skin. The game applies the chosen geometry to the existing image. A careful conversion needs the arm faces and their outer layers remapped, with attention to the top, bottom and side surfaces as well as the front.
Use a skin editor that understands both models if you want to adapt a file. Keep a copy of the original, change the target model in that editor and inspect each arm face. Redraw details that lose a pixel column, then inspect both arms from every angle. Simply shrinking the whole PNG would also alter the head, torso and legs, so it cannot solve an arm-only difference.
Choose Classic for Photo2Skin results
Photo2Skin's style choices change the generated look, not the arm geometry. Classic, Cartoon, Knight and Spooky all produce Classic-arm skins. The separate Java and Bedrock choice is an edition choice; it does not enable Slim output. Keep these settings separate in your mind when checking your result.
When adding your generated PNG in Java, choose Classic for the model. On supported Bedrock devices, choose the wide-arm model when the import flow asks. The Minecraft skin installation guide covers the import steps and device limits. Consoles cannot import custom PNG skins through that workflow.
Keep the saved texture at 64×64 and preserve its PNG format. Generating and saving with a visible watermark costs nothing, while one credit saves without the watermark. Whichever save option you use, the generated skin still has four-pixel arms. If your goal is specifically a Slim character, plan to adapt the texture in a separate editor afterward.