How to Make a Minecraft Profile Picture
Make my skin — no-watermark from $1
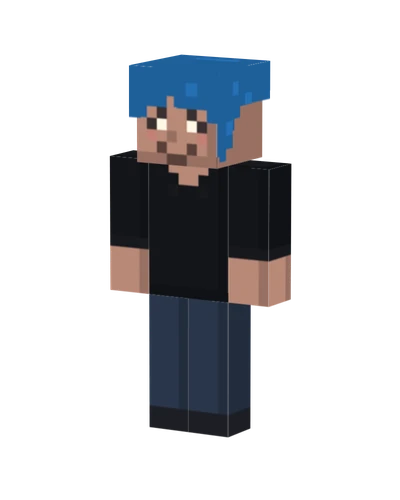
A Minecraft profile picture is a square image of your character, usually cropped around the head and shoulders. It is different from a skin PNG: the PNG is an unfolded texture, while the profile picture shows that texture wrapped around a model. You need a rendered view or a screenshot before a skin can become a recognizable avatar.
This guide uses a skin you already have, a local 3D viewer and ordinary screenshot tools. Photo2Skin's viewer lets you inspect and position a character; it has no dedicated profile-picture image save control. The capture and final crop happen with your device's screenshot and image-editing tools.
Start with a skin that reads at small sizes
If you have a skin PNG, keep its original file untouched. For this workflow, use a modern 64×64 texture. If you are starting with a portrait, the Photo2Skin photo-to-skin generator can make a classic-arm skin using sampled photo colors. Choose a clear portrait, set the Head, Face and Clothing regions, choose a style and generate the result.
Think about the features that will survive a small crop. Hair shape, a contrasting shirt and two clear eyes usually matter more than tiny shading changes. A pale face against a pale background can disappear, so choose a background or crop that separates the head from its surroundings. You do not need to repaint your entire skin just to make a useful avatar.
Position the character in the 3D viewer
Open the Minecraft skin 3D viewer and choose a 64×64 PNG from your device. Alternatively, choose Use generated result to read the most recent skin stored in this browser. That generated-result view includes a visible watermark. Changing browsers or clearing storage can remove that local result, so keep a saved PNG if you want to return later.
Select the arm model that matches the texture. Photo2Skin-generated skins use Classic arms. Rotate the character until the face and some of the torso are visible, then zoom to make the head the main subject. A slight three-quarter angle can show hair depth, but avoid turning so far that one eye disappears. Check the outer-layer toggle if glasses or a fringe seem to be missing.
How to make a Minecraft profile picture: capture and crop
Use your device's screenshot tool to capture the positioned character. Capture only your own work or a skin you have permission to use. If you are using a watermarked result, keep the visible watermark. To obtain a skin save without that watermark, use the generator's credit-based save option; do not remove it by editing the screenshot.
Open the screenshot in an image editor and set a square crop. Leave a little space above the hair and beside the cheeks. Keep buttons, file names and other browser controls out of the image. When the interface cannot be excluded while keeping the watermark intact, use a properly saved skin file and position it again rather than cutting away the mark.
Save the cropped image as PNG to keep sharp edges. A larger source capture gives you room to crop, but enlarging a tiny screenshot will not recover detail. Keep a full-size working copy, then resize a separate copy to the dimensions your profile service asks for.
Check circular crops and small displays
Many services display a square upload through a circular mask. Imagine a circle inside your square: hair corners and shoulders near the edges may be hidden. Center the eyes, leave breathing room around the head and check the result on the actual profile page before deciding that the crop is finished.
View the image at a small size, such as 48 pixels across, as well as at full size. If the face is hard to identify, tighten the framing slightly or use a simpler background in your image editor. Avoid adding a long name or tiny lettering; those details compete with the face and become unreadable in comments or chat lists.
Keep the texture and the profile image separate
Store the original skin PNG, your screenshot and the finished avatar under different names. Upload the cropped image to your profile service, and use the unfolded skin PNG when changing your Minecraft character. Swapping those files is a common mistake: a square screenshot is still a picture, even if its dimensions happen to match a skin texture.
When you change your skin later, repeat the same angle and framing to keep your profiles consistent. Check the service's current image requirements before uploading, since allowed file sizes and cropping tools differ.